Jump to content
Hamer Fan Club Message Center
  • 0

RAN - Rusty old custom paintjob (Picture intensive) a.k.a. "Mr Rusty"


DBraz

Question

Posted

I acquired this RAN Custom RR about 18 months ago for a very good price. The reason I got it so cheaply was due to the fact the paint was chipping and peeling. It was literally coming off in clumps. Initially nervous that the whole guitar may be a binner I was assured from the seller, a professional guitarist friend of mine, that I could have my money back if I was not completely satisfied.

The guitar itself is superb constructed by a custom shop in Poland. The neck in particular is of an extremely high quality and the action super low without any buzzing worth talking about. I can see why these guitars are getting recognition.

Spec includes Schaller Floyd rose, EMG81/85 pickups, neck through multi-piece neck, alder body, ebony board, jumbo frets. It’s a Metal guitar for sure.

I stripped the paint (which was very easy) and the guitar stayed in it’s case for about a year before I decided what to do about a repaint. I recruit for a living and low and behold a well respected professional friend of mine from years ago – Steve Woolley – has, since I last spoke to him, turned his hobby into a living. He is a very well respected artist, particularly with airbrushing, having painted WW2 helmets/Bike Helmets/Bike tanks/Canvas etc for clients all over the world. His work truly is awe inspiring. http://skywolf.co.uk/

It seemed appropriate to approach Steve to paint my guitar – a task he took on with relish. I laid out a brief for a unique paint scheme. I wanted the guitar to look like a piece of rusting metal from the 40’S or 50’s with the sharp lines/edges accentuating the rust at appropriate points. Front/back and pickups.

Below is an outline of the guitar from beginning to end.

RANCustomRR3_zpsebfb9f84.jpg

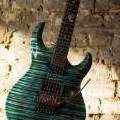
As it left the factory. Custom tiger stripe/tribal finish.

060_zps5d2c433f.jpg

Stripping begins. The paint literally flaked off.

058_zps8a42ee36.jpg

No need for special tools. The paint was coming off in chunks with a bit of plastic. It became a game of "how big a chunk at a time can I get off in one go?"

087_zps4421b281.jpg

Some careful sanding and it was all starting to come together. At least as far as the preparation was concerned. I paid particular attention to the binding, making sure it was sanded down to plastic, knowing that it would be lacquered over at a later date.
Below is how it was when it reached Skywolf.

DavidsGuitar1103_zps8c77fd9f.jpg

Recommended Posts

Posted

DavidsGuitar1106_zpsef71350b.jpg

Davidsguitar2102_zps91ff157e.jpg

Skywolf: "Took off knobs and switches leaving in wiring. Removed lots of original coating from under knobs and within recesses for pickups/jack plug holes etc as it looked like the original coating was applied by dipping so had coated everything, including all the holes.

Old dowelling/wood filler shite was drilled out using very slow speed drills slowly using bigger diameter until original drilled hole was empty of shite. New dowelling wood cut to length and glued into holes. Then pilot holes drilled to allow new screws on rebuild."

Davidsguitar2110_zpsf13b3e8e.jpg

Davidsguitar2116_zpsbaf77efb.jpg

Skywolf: "Guitar then had areas masked - as the wiring was to stay and not best to paint, the recesses were masked as well. Wrong, as this is the first guitar I've done, I didn't know that the thing that holds the strings moves about when doing Joe Satriani show off stuff and doesn't fill up the entire recess (this part of the masking was removed later and painted to match).

Guitar imperfections (knocks/scratches etc) were filled using resin body filler and sanded. Complete guitar sealing coat was sanded to give a bond for the primer.

Masking was applied to allow a first and second strip. The paint goes on, the first layer of masking is removed revealing a second layer of masking that allows the lacquer (clear coat) to overlap the paint and gives a smooth finish rather than a ridge. This is then sanded away once all is dried to give no edge to the paintwork on the neck of the guitar."

Davidsguitar2118_zpsa56ebd61.jpg

Davidsguitar2125_zps59002932.jpg

Posted

Skywolf: "2 coats of primer filler applied sanding between coats with any further minor imperfections sanded out.

Base colours were then applied to build up to rusty looking lump. Intentions (in my head) were to not have too much Aluminium paint showing so a lot of stencil work was done during the base colour build up.

Davidsguitar2131_zpsee0ee35e.jpg

Davidsguitar2134_zpscc233565.jpg

Davidsguitar2140_zps99829115.jpg

Davidsguitar3104_zpse44035e8.jpg

Davidsguitar3111_zpse0b1268b.jpg

Posted

Davidsguitar3113_zps28eab2be.jpg

Skywolf: "Then each flat surface on the guitar (9 of them I seem to remember) was masked to allow the salting method - salt (rock or sea salt cause it is bigger bits) is piled up against the raised masking and a fine aluminium base is sprayed on. The ali paint is reduced by about 100% and pooled on the flat surface (this gives an uneven and old look). It is then dried quickly with a hot air gun to keep the pooled look. The salt is brushed away - all over the work room, computer, cups of tea and anything else in the area - and the masking removed. This is then sanded to remove bumps, stuck salt etc and then do the same process on the next flat surface. The guitar needs to be held so that the surface being sprayed is horizontal so a cunning system of holding with cushions and chairs etc is required. (Remember to clean these when finished or the admin staff gets very upset - its almost as bad as wiping your knob on the curtains).

Curved surfaces have to have water splashed about so that the salt sticks a bit before the ali paint is sprayed on.

The whole guitar is then fettled using matching paints to make it look 'whole' as each area needs to be joined to the next by airbrushing over joints and corners.

Davidsguitar3114_zpsed1adcbf.jpg

Then you take some pictures and send to customer who says "Can I have more aluminium" - bugger. So, redo all the salting and spraying again."

Davidsguitar31072_zps345d1e5a.jpg

Davidsguitar31082_zps537e32f6.jpg

Davidsguitar4103_zps428aca1f.jpg

Davidsguitar4104_zps8c982162.jpg

Skywolf: "Once all complete, excess salt swept up and cushions etc re-cleaned then you can start the fun bit. Making it look rusty so that the guitar looks like it just came out of a skip.

Three colours are mixed up - orange, brown and purple. Orange goes on first to make up the largest area of rust, then the brown and then the purple. Each darker colour must be smaller than the last - do not overdo the purple. Then some touching up, a bit of black where it looks like its needed and hey presto, one rusty guitar.

Then you take some more pictures and send to customer who says "Can I have more rust on the pickups". So, redo all the salting and spraying again on the pickups as above. More photos and customer says ok."

Posted

Davidsguitar4106_zpsd2e2edb8.jpg

Davidsguitar4109_zpsa74079fe.jpg

Davidsguitar4110_zps500e4145.jpg

Davidsguitar5102_zps4f6ac923.jpg

Skywolf: "2 to 3 coats of lacquer, let cure for a day, sand everything down and add another 2 to 3 coats of lacquer. (This was using a 2 pak resin lacquer that is used on motorcycle tanks so that petrol doesn't kill it - in hindsight an acrylic lacquer would have been ok and easier to apply). Sand everything making sure the edges are smooth along the neck of the guitar. Fix the odd spot and polish away to your hearts content using a cutting compound and discs and then polishing compound and softer discs. Send more photos, get ok and send guitar off to a hopefully well pleased customer.

Get admin staff to put photos on webpage and hope that loads of guitar owners want their guitars painted."

Davidsguitar7105_zps928699e1.jpg

Davidsguitar7107_zpsdaa84cc0.jpg

Davidsguitar7111_zps89ee13b8.jpg

I appreciate that the guitar shape is not to everybody’s liking, nor is the paint finish, but I was looking for something different. A little out of the ordinary if you like. Steve from Skywolf.co.uk has achieved that and more.

I am in the process of having a professional set of photographs done of all my guitars and will include some of this all strung up in the next week.

Skywolf.co.uk are UK based (obviously) and Steve is looking to enhance his portfolio by painting custom finishes. Personally I already have a second commission planned as I am so pleased with what he has done. Steve is a straight talking Londoner, communicative (I received updates more than once/day during the process with pictures) and can paint practically anything (look at his website banner for an example of what can be done).

David

Posted

The shape is definitely not my style, but the finish is awesome. It is a perfect choice on that guitar, but I can see it working pretty well on others. Now we need pics of it all back together...with you rockin' it B)

Posted

SWEET!!!!

I can understand why that wouldn't be everybody's cup of tea but I think it's all sorts of badass! Truly a shredder's delight. Assuming you play some METAL on that beauty? :lol::rolleyes:

reminds me a lot of the work that Mike Learn does here in the States. He hooked up my Godzilla Cali:

http://www.mikelearn.com/

100_0608.jpg

Posted

I would be interested to see how people would rate Steve's work against Mr Learn's?

Please bear in mind this was Steve's first guitar.

Posted

Great job on the finish.

Make sure your tetanus shot is up-to-date! :D

Posted

Wish he was in the USA. Not sure how he's priced, but that's some killer graphic work.

Posted

Beautiful finish!

Be sure to not call it 'aluminum' though-aluminum doesn't rust like that!

Posted

Beautiful finish!

Be sure to not call it 'aluminum' though-aluminum doesn't rust like that!

That's Steve talking (from Skywolf).

He should know better as he's a civil engineer by trade!

Posted

That. Is. Simply. Badass. Wow.

Reminds me of that company (name escapes me right now) that makes those killer hollow teles out of aged-looking metal - and commissioning a Rhoads out of them.

Posted

Beautiful finish!

Be sure to not call it 'aluminum' though-aluminum doesn't rust like that!

He did say the guy was Polish after all.

The guitar is Polish. Steve at Skywolf is English!!!

Archived

This topic is now archived and is closed to further replies.

×
×
  • Create New...